Introduction to Analyzing Text with Azure AI Language Service and C#

How much text data do you generate on a daily basis? This could take the form of an email to a coworker or a social media post. You may have visited a new restaurant and left a review online, or you may have prepared certain documents, such as contracts, as part of your job. Imagine all of that data being generated on a global scale. How can we use AI to glean insights from this massive volume of text data?
The Azure AI Language services offer an API for common text analysis activities that may be integrated into your own application code.
In this blog post, we’ll start by learning how to provision an AI Language service using Bicep. We’ll then use that service to perform a couple of text analytics tasks, such as detecting the language from some text, analyze the sentiment of that text, and extract key phrases, entities and linked entities from that text.
Let’s dive in!
Creating an Azure AI Language resource in Bicep
To use Azure AI to analyze text, we’ll need to provision a resource for it. We can do this with a Bicep template. Create a new Bicep template called main.bicep, and write the following:
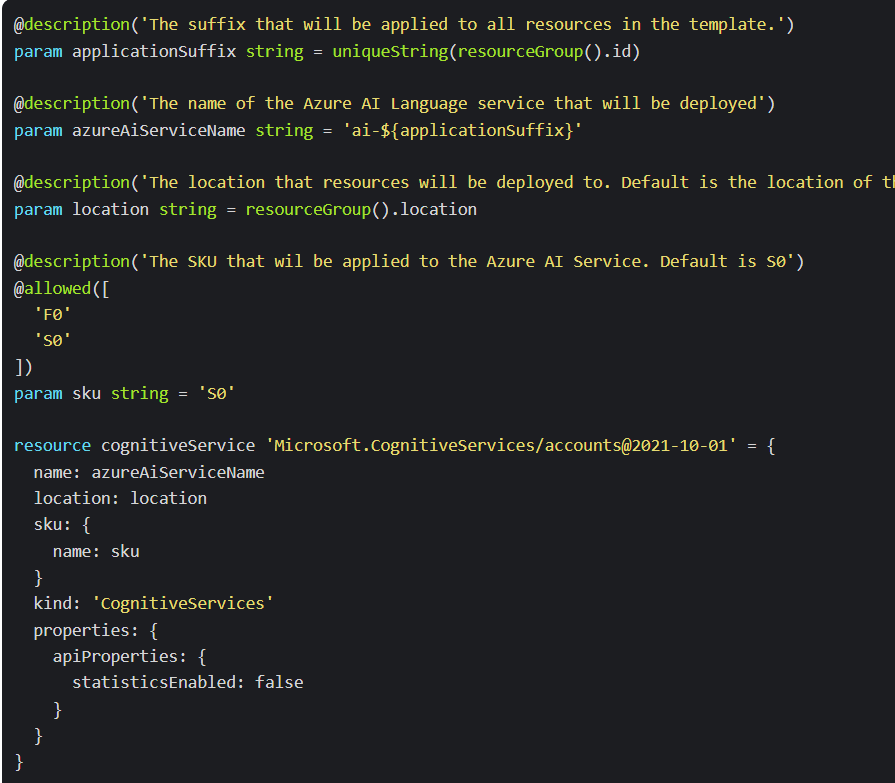
Let’s break down the template:
- For our parameters, we give our Azure AI Service a name, location, and sku.
- We can provision either a Free resource (F0), or a Standard resource (S0). For this template, I’ve used Standard for now.
- For the
kindproperty, I’ve usedCognitiveServices. This will create a multi-service AI resource, which gives us access to all the Azure AI API’s. If you want to create a resource that has a specific functionality, - For our location, I’ve used the location of the resource group that I’ll deploy my resource to as default, you can change this to any supported Azure region
To deploy the template, it’s a simple matter of creating the resource group that we’ll deploy the Azure AI service to, and then deploying the template. We can do this by running the following commands:
$ az group create --name --location

$ az deployment group create --resource-group --template-file main.bicep
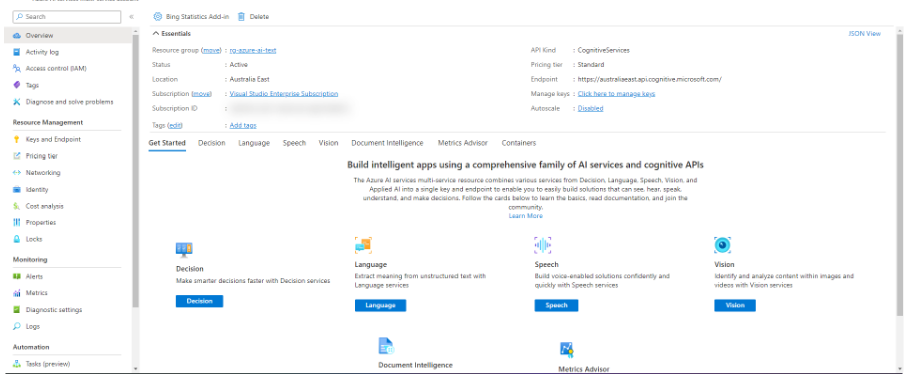
Once your template has been successfully deployed, you should see the following in the Azure portal:
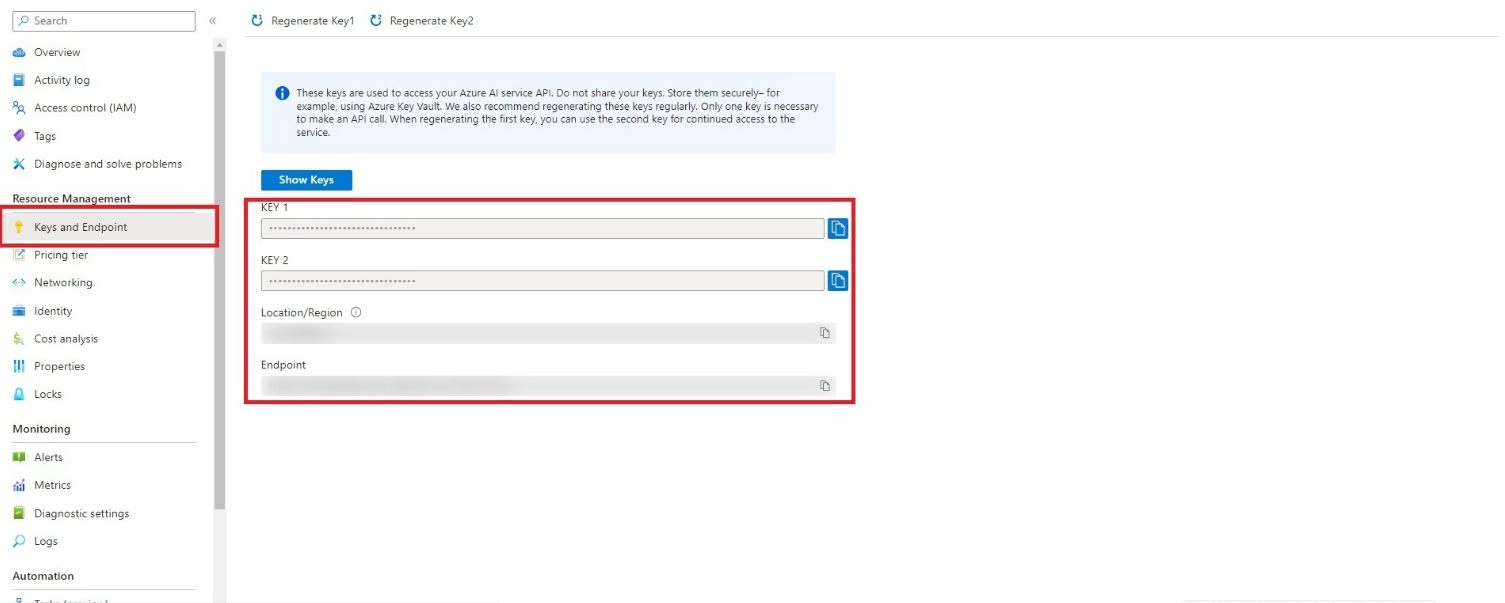
To complete the rest of the tasks in this blog, we’ll need to get the Endpoint and the Key so we can authenticate to the Azure AI client in our code. We can do this by clicking on the Keys and Endpoint tab in the menu. Copy and paste the Endpoint and one of the Key values:
What can Azure AI Language do?
As I mentioned in the intro, Azure AI Language is designed to help you extract information from text. You can use it for:
- Language detection - What language is this text written in?
- Key phrase extraction - identifying important words and phrases in the text.
- Sentiment analysis - Is this text positive or negative?
- Named entity recognition - detecting references to entities, including people, locations, organizations, etc.
- Entity linking - identifying specific entities by providing reference links to Wikipedia articles.
Let’s dive into these capabilities one-by-one to discover how this all works:
Language Detection
With Azure AI Language services, we can evaluate the text input and determin which language the text has been written in. This is great for when we encounter text where we don’t know what the language is.
You essentially provide the service with some text, and the API will respond with a confidence score between 0 and 1 (the closer to 1, the higher the confidence) as to what language the text has been written in.
You can pass in either single phrases, or entire documents. You are limited to document sizes of under 5,120 characters per document, and 1,000 items.
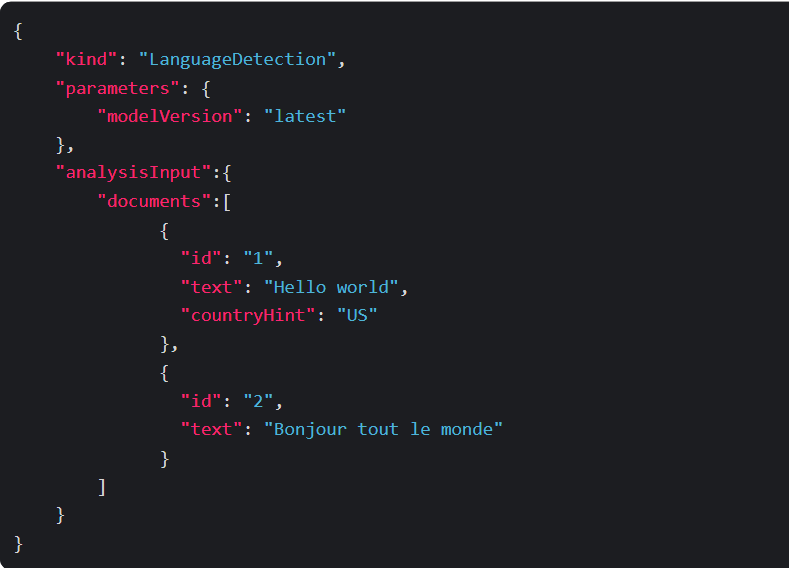
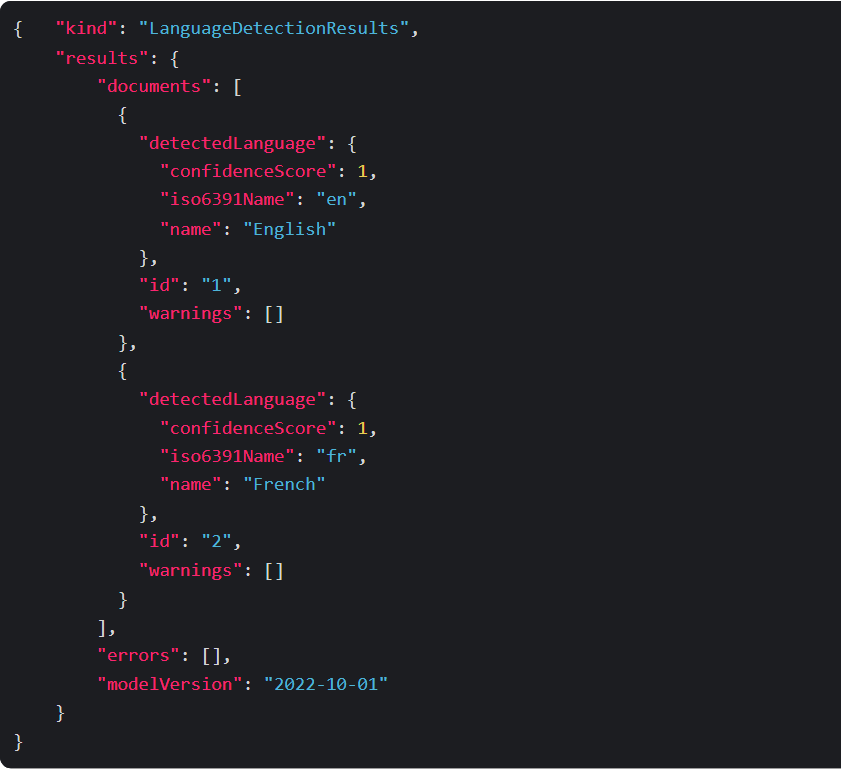
Let’s take the following JSON request that we might provide the service:
The AI service will return a JSON response that contains the result of each document in our request, including the predicted language and a confidence value of the prediction. So for this request, we might get the following response:
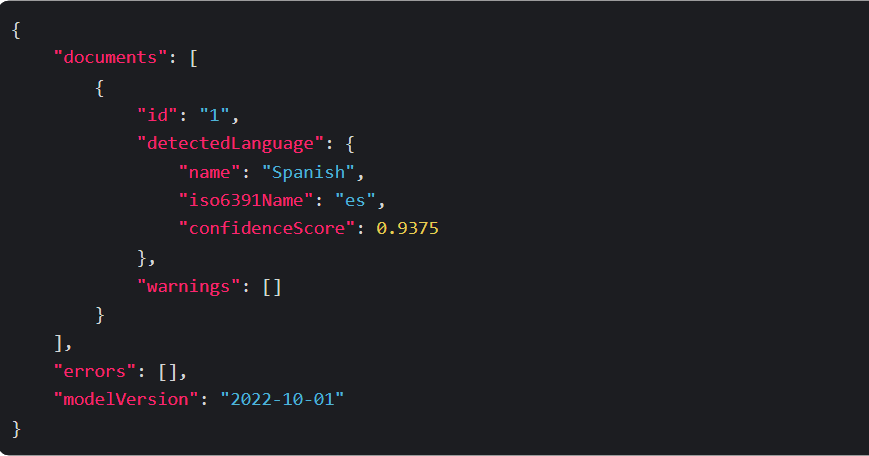
This is relatively straight forward, but what if we passed in content with multilingual content? We may get a different result. If our text was predominantly written in English, that will be the language returned as the largest representation in the content, but the confidence rating would be lower. Take the following request as an example:
Then our response would be as follows:
There may also be content where the language is difficult to detect. This can happen due to characters that the analyzer is unable to parse. In this scenario, the response for th language name would be (Unknown) and the confidence score would be 0:
Key Phrase Extraction
Key phrase extraction is fairly straightforward. This is when Azure AI will look at the text of a document or input, and then identify the main points around the context of the document. This works best for larger documents (still taking the limit of 5,120 characters into account).
Let’s take a look at the following request:
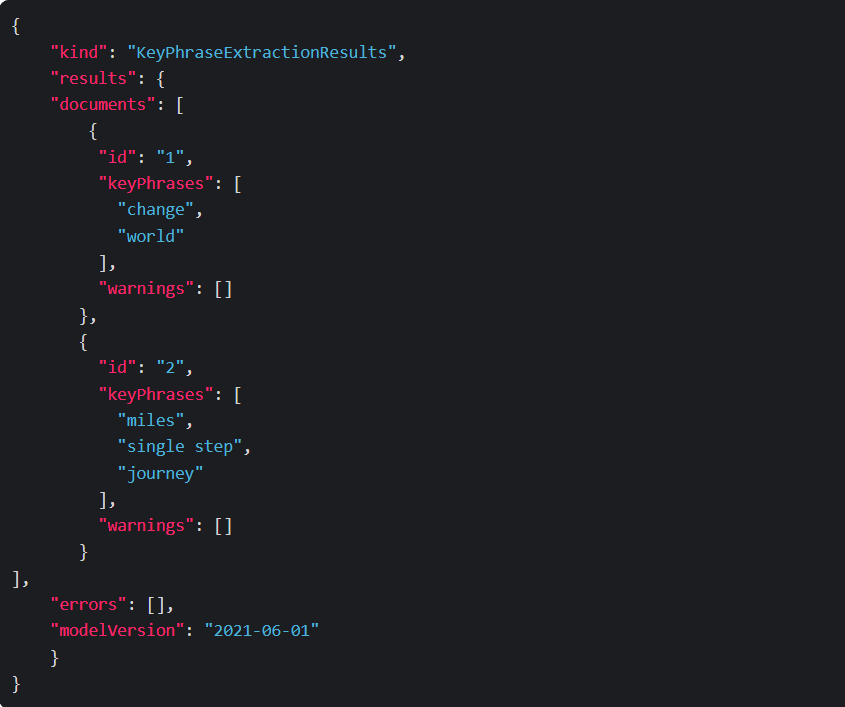
The response from Azure AI Language service would contain a list of key phrases detected in each of our documents:
Sentiment Analysis
If we want to determine whether a text input or document is positive or negative, we can use Sentiment Analysis to perform such tasks. This is helpful when we want to perform tasks such as evaluating reviews of restaurants, books, products, or evaluating customer feedback received on emails or social media.
When we analyze sentiment using Azure AI Language, the response will include the sentiment for the overall document and individual sentence sentiment for each document submitted to the service.
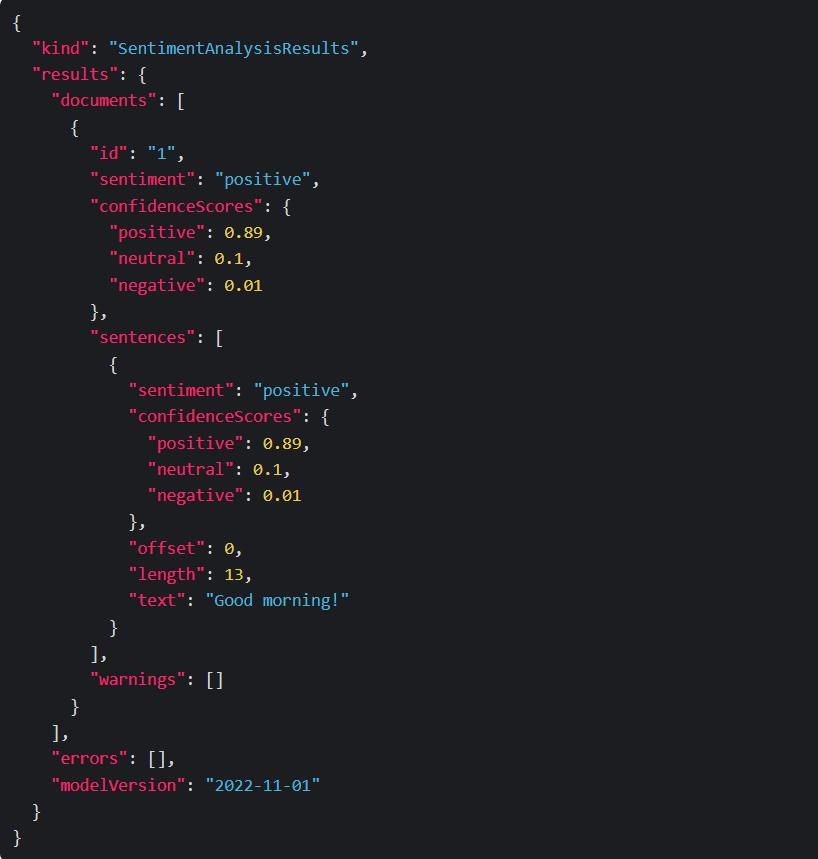
Take the following request as an example:

The response could look like this:

Again, confidence scores are scored between 0 and 1 (the closer to 1, the more confident Azure AI is of the sentiment). Sentences can be positive, neutral, negative and mixed.
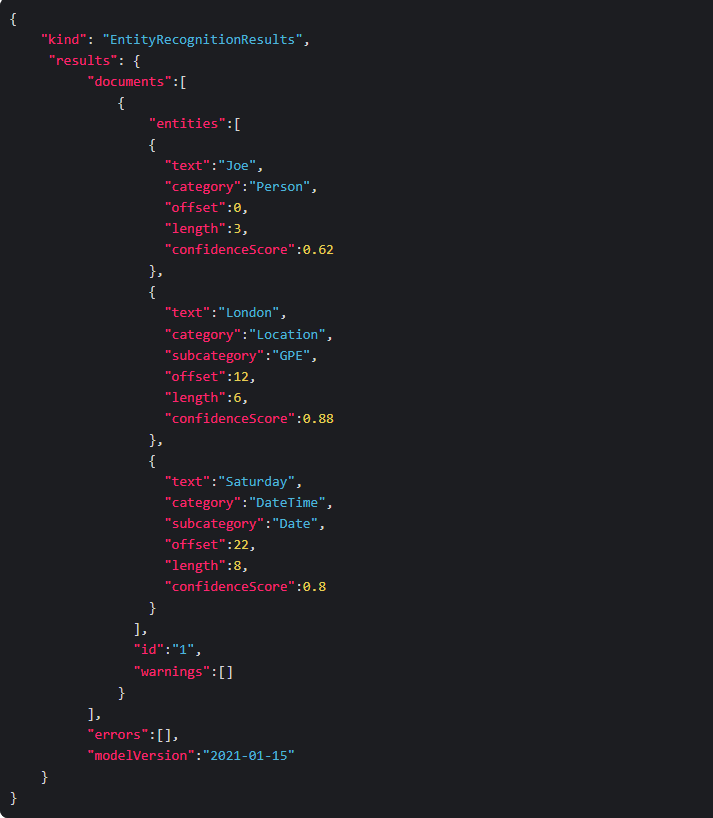
Named Entity Recognition
In Azure AI Language Service, Named Entity Recognition (NER), identifies entities that are mentioned in the text. Entities are then grouped into categories and subcategories. Some examples of entities include:
- Person
- Location
- DateTime
- Address
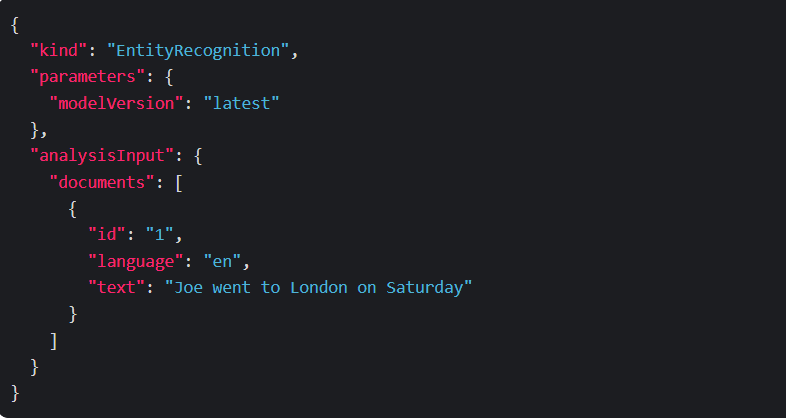
So if we provide Azure AI Language with the following request:
The response from Azure AI Language would include a list of categorized entities found in each document, like this:
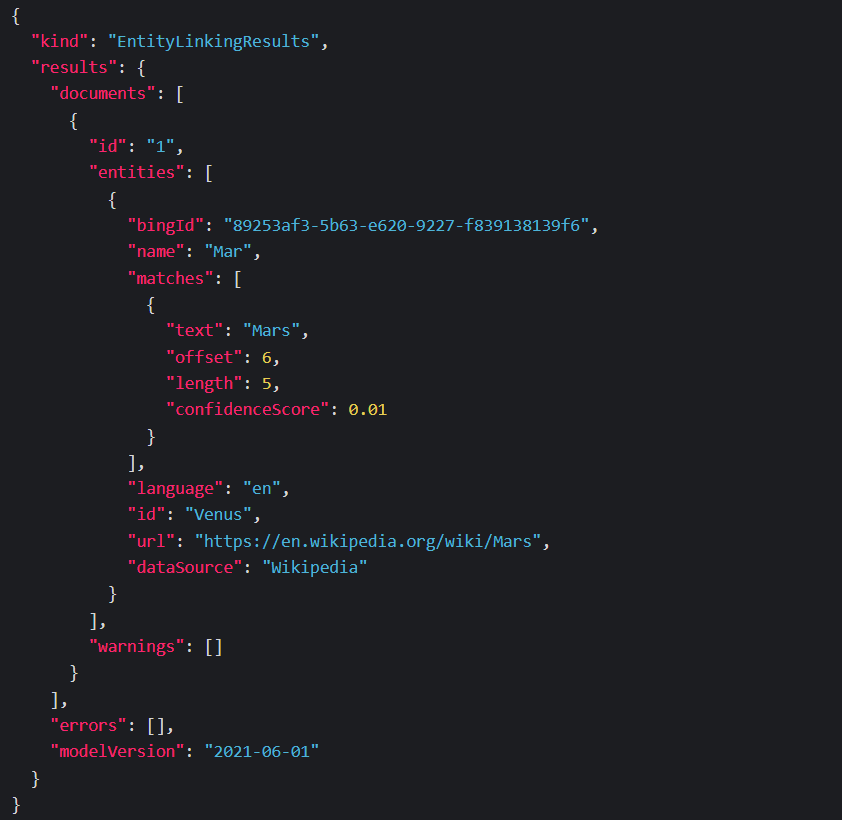
Entity Linking
Now in some text inputs, the same name might apply to more than one entity. A good example of this is the planet “Mars”, or is the the Roman god of war “Mars”, or is the yummy chocolate bar “Mars”.
In these situations, we can use Entity Linking to disambiguate entities of the same name by referencing an article in a knowledge base. In Azure AI Language, Wikipedia provides the knowledge base for text. When we receive a response, we’ll be given an article link from Wikipedia based on entity context within the text.
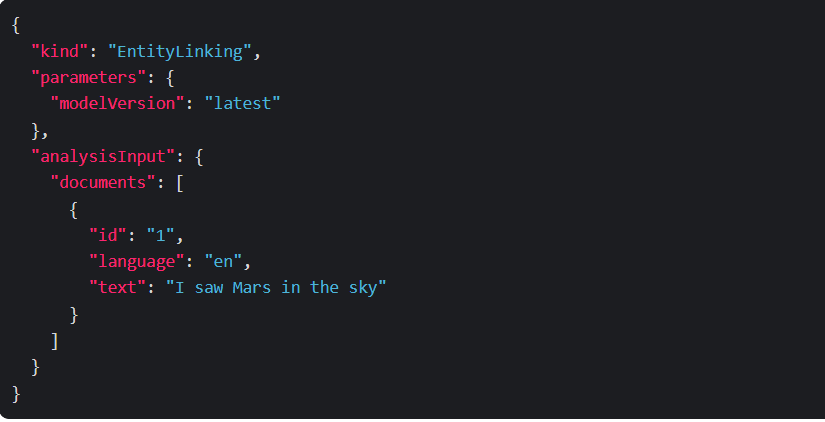
Take the following request as an example:
The response we get from the Azure AI Language service includes the entities identified in the text, along with links to associated articles:
Working with Azure AI Language in C#
Now that we’ve learned a little bit about how Azure AI Language works, let’s create a simple console application that explores the functionality a bit more.
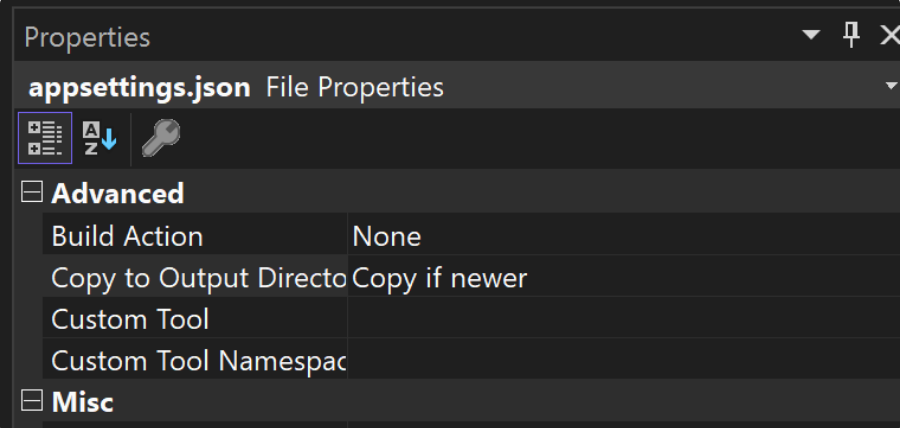
To do this, we’ll need to retrieve the endpoint of our Azure AI service along with the API Key. Retrieve these from the portal (Under "Keys and Endpoints" in the portal), and then create a appsettings.json file, and store them like this:

In Visual Studio, we’ll need to set the Copy to Output Directory value to Copy if newer in the appsettings.json properties, like so:
We now need to install some packages to work with Text Analytics and to load our configuration. To do this, we can run the following dotnet commands in the project directory, like this:

Alternatively, you can install these packages by right-clicking the project file in Visual Studio and selecting Manage NuGet packages.
Let’s write some code to create our Azure AI Text Client:
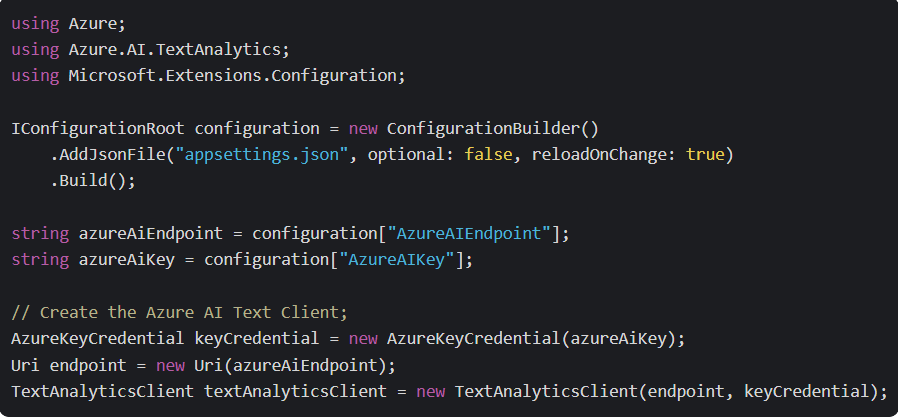
In this code block, we load the configuration file and set two variables. One is for our AzureAIEndpoint and the other is for our AzureAIKey. We use these two variables to build an AzureKeyCredential object for our key and a Uri object for our endpoint. We can then use these two objects as references to construct a TextAnalyticsClient object.
With our client constructed, we can begin to experiment with some text analytics functionality. Let us start with Language Detection. In this software, we'll simply enable the user to enter some text and let Azure AI do its thing.
To determine the language of our input, we can perform the following:
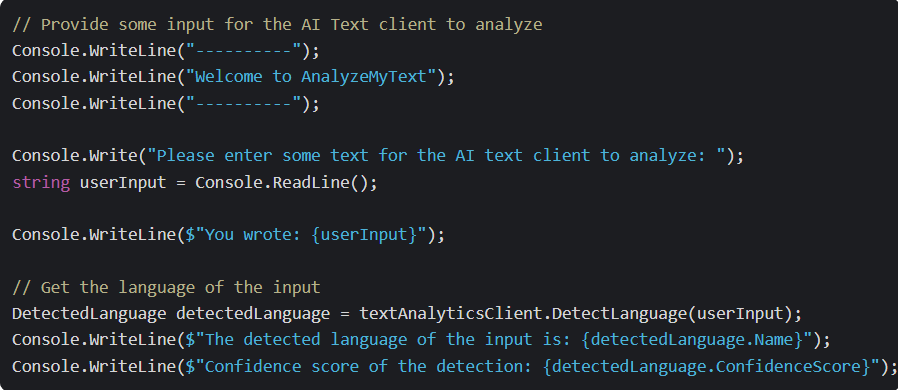
The language detection is happening via the DetectLanguage method. We pass our userInput to the method, and it will tell us what language the input is in, and the confidence score of the prediction. So for example, when we run the program, and pass in the sentence The weather in Rome is quite sunny, I had a fun day, it produces the following output:

If I try and enter the same input again, but in Italian, this is the output:

Azure AI recognized the input as Italian and is confident in its accuracy!
(NB: I'm attempting to study Italian in my spare time, but I'm not sure if this is correct Italian, so I apologize in advance!)
Let us now go on to sentiment! Here, we want to determine whether our input is positive or negative. We can extract the sentiment from the input by writing the following:

The sentiment is being retrieved through the AnalyzeSentiment method. We pass in the input to that method, and it returns the overall sentiment, and a confidence score of positive, neutral, and negative sentiment. Taking the same sentence as before, it produces the following output:

Azure AI has determined that the input was overall positive, with 93% confidence. It also assigned the sentence with 6% neutrality and 1% negativity.
Let’s move on to Key Phrase Extraction! We can do this using the ExtractKeyPhrases method. This will take our input, and if the service can find any key phrases or topics that’s in the sentence, it will extract them out:
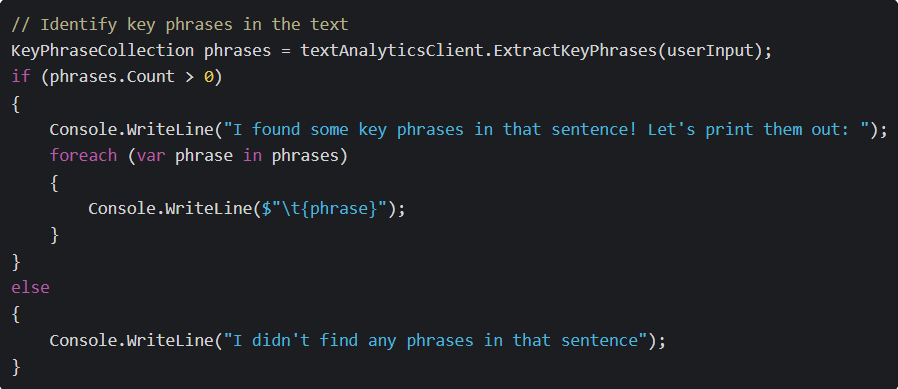
Passing in our input, we should see the following output:

Our program has taken our input, and Azure AI has determined that fun day, weather, and Rome are the key phrases in our sentence.
We can do something similar for extracting entities. With the RecognizeEntities method, we can pass in our input, and Azure AI will extract the entities, which we can then use to see what categories or subcategories that entity belongs to:
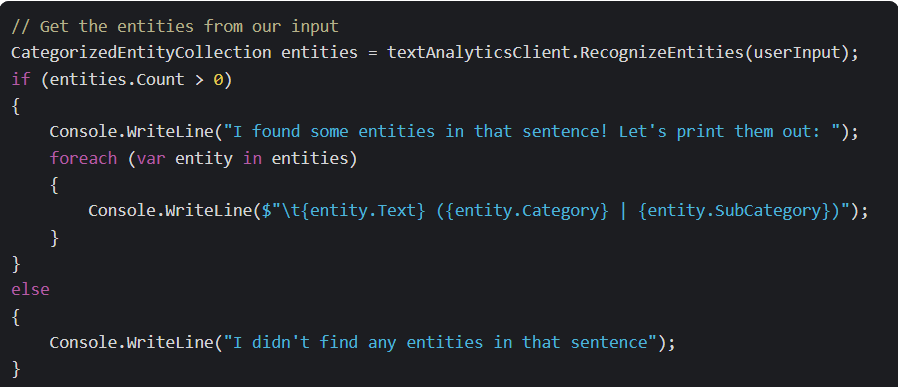
With our input, we get the following:

Azure AI has identified Rome as an entity, and categorized it as a Location. It has also extracted to sub-categories, City and GPE or Geopolitical Entity.
Finally, let’s extract linked entities from our input. To do this, we can pass our input into the RecognizeLinkedEntities method, like so:
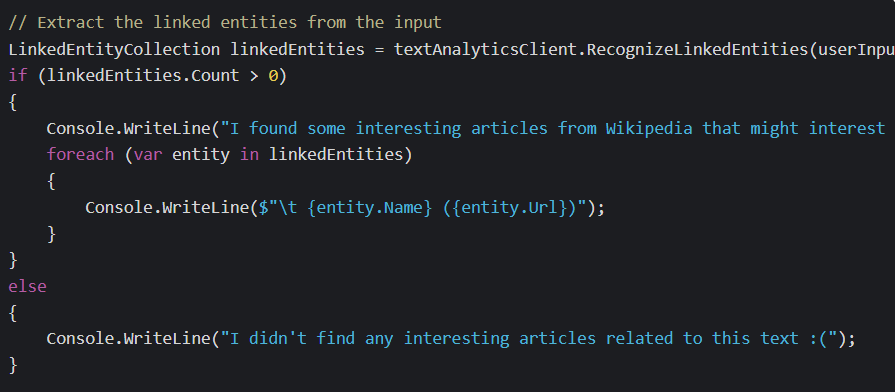
Here, Azure AI will analyze our input and provide us links from Wikipedia to any entities that are identified in the input. Using our sentence from before as an input, we should get the following output:

Azure AI has found Rome as an entity and has provided us with a link to an article on Wikipedia for Rome.